


Burnt Basque Cheesecake: Really?
Cheesecake baking rules go out the window

A Little Background
Our dear friend, Dianne Jacob, and her husband, Owen Rubin, were coming over for dinner, and I said I’d make a cheesecake for dessert. I was thinking of lilikoi, passion fruit, as a possibility. But then, Dianne asked if I’d ever made Burnt Basque Cheesecake.
I frowned at the name, then shook my head, then shook my head again. Why would anyone deliberately burn a cheesecake? Intrigued, I picked up my iPhone and began searching for information about it. Turns out Basque Burnt Cheesecake is a real thing. People go wild over it. They blog about it, and they photograph it endlessly. And I had never heard of it.
There’s nothing unusual about the ingredients in the Burnt Basque Cheesecake. But what set off all my alarms was the baking temperature: 400˚F. For the entire baking time of 60 to 65 minutes!
If you don’t make cheesecakes, that direction may not seem strange. But most cheesecake recipes say to bake at a much lower temperature, 300˚F for 45 to 60 minutes. The cheesecake top winds up with a pale beige or off-white color and the cake’s texture is creamy and smooth.
Overbaking a cheesecake is easy because the center of a cake that’s been properly baked will jiggle, giving the impression that it’s underbaked. Not so. The cake is done. Time to take it out of the oven.
Meet Lindy’s Cheesecake
One exception to the low temperature cheesecake baking rule is Lindy’s Cheesecake. This classic New York style cheesecake sports a pastry crust on its bottom and sides. You put the cake into a preheated 525˚F oven. (Yes, no joke!). Bake for 10 minutes at this hellish heat, then decrease the temp to 200˚F and bake for an additional 60 minutes. The initial high heat gives the cake a deep brown color that looks as though it’s burnt.
My Basque Cheesecake Adventure
So off I went to make Burnt Basque Cheesecake. It has no crust. You bake the cake in a 9- or 10-inch spring-form pan lined with parchment paper that you just scrunch into the pan to make uneven pleats. The 400˚F constant temperature breaks all the rules of cheesecake baking. Have we been wrong all these years? Why does this cake not overbake?
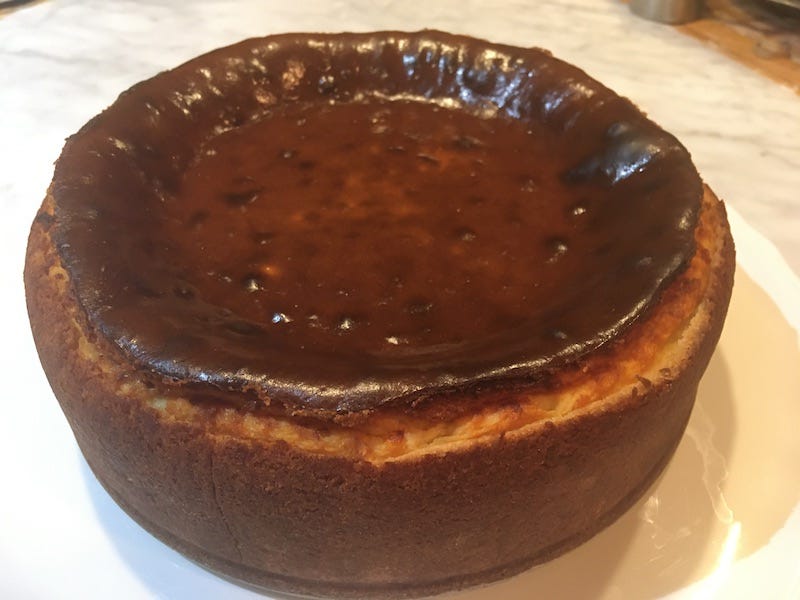
I followed the recipe from Bon Appétit magazine. The photo of the cake online is simply beautiful. Very dark brown on top, like Lindy’s Cheesecake, and the sides unevenly light and dark brown, a result of the pleated parchment paper.
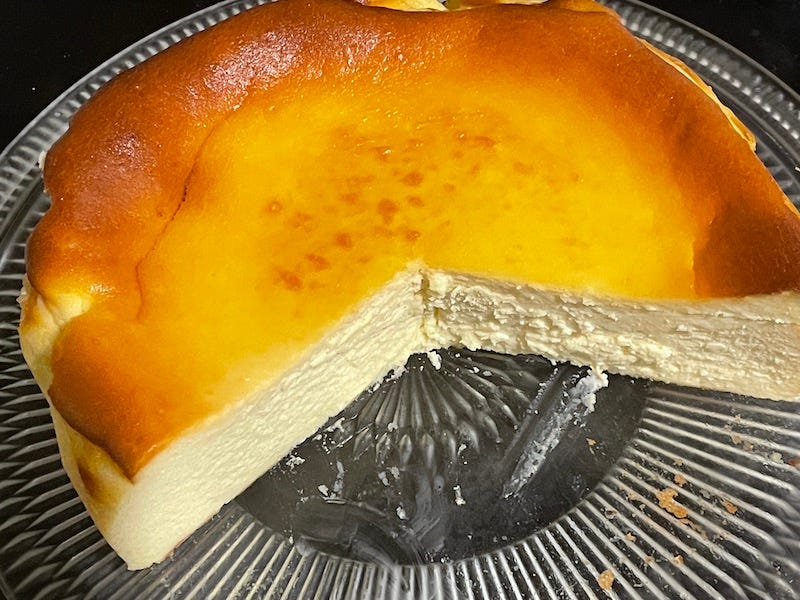
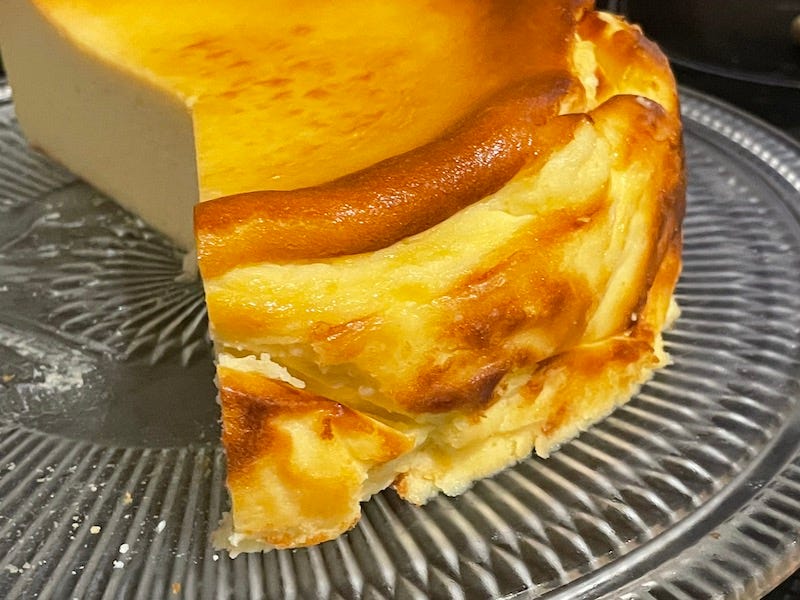
My cake didn’t brown as deeply as did many online Burnt Basque Cheesecakes, but its creamy, smooth, unctuous texture hooked me. I gave some of the cake to my next-door neighbor. About ten minutes later he came knocking on my door asking for the recipe. He told me he’s not a fan of cheesecake, but he just loved this cheesecake! He had never tasted anything like it.
Burnt Basque Cheesecake
So here’s the Bon Appétit recipe. It says to use a 10-inch springform pan. I had a 9-inch pan, and it worked just fine. The batter came very close to the top of the pan but it did not overflow during baking.
The original recipe comes from La Viña, a café in San Sebastian located in Spain’s Basque region. What I’ve read says that in 1990, the chef, Santiago Rivera, began baking a new type of cake each day. Eventually, he developed the Basque cheesecake recipe. This cake’s been around for about thirty years! How could I have missed it?
Here’s a list of ingredients
Butter for the pan
2 pounds of full-fat cream cheese
1 ½ cups granulated sugar
6 large eggs
2 cups heavy cream
1 teaspoon Diamond Crystal kosher salt or ½ teaspoon table salt
2 teaspoons vanilla extract
1/3 cup all-purpose flour (spoon into 1/3 cup dry measure and level with a straight edge)
Directions
All ingredients should be at room temperature. So have the cream cheese unwrapped and in the bowl of a stand electric mixer; the eggs ready to be cracked; and the heavy cream measured. The sugar, flour, salt, and vanilla will most likely already be at room temperature.
Here are specific tips in the recipe to guide you to success.
1. Prepare the pan: Butter the bottom and sides of a 10-inch (or 9-inch) spring form pan. Criss-cross two sheets of parchment, about 16 x 12 inches each, and press them into the pan to make a flat bottom with irregular pleats on the sides. The ends of the parchment should face straight up. Don’t fuss with this step. You want the sides of the cheesecake to have a rustic look.
2. Place the pan onto a rimmed baking sheet.
3. Preheat the oven to 400˚F with the oven rack in the center position.
Make the Cheesecake
My instructions call for using a stand mixer with flat beater and whip attachments. Mine is a KitchenAid with a 5-quart bowl. If you don’t have one but you do have a hand-held electric mixer, be sure to use a large bowl to make the batter.
4. Attach the flat beater to the mixer and beat the cream cheese on medium speed for 2 minutes. Stop the machine and scrape the cream cheese off the side of the mixer bowl. Beat again on medium speed for 1 to 2 minutes. The cream cheese should be completely smooth with no lumps. Scrape the bowl and beater. It’s very important that the cream cheese is completely smooth.
5. Start the motor again. On medium speed, slowly dribble in the sugar, taking about 1 minute to add all of it. Then continue beating for 2 minutes until completely smooth. Scrape the bowl and beater again and beat on medium speed for 1 minute.
6. Crack an egg into a small cup. Check to see there’s no shell. If there is, remove it with half an egg-shell.
7. Set the motor to medium speed and add the egg. Beat for 15 seconds. Continue cracking one egg at a time into the small cup, removing any shell, and adding the egg to the mixing bowl. Beat for 15 seconds. Repeat until all six eggs have been added. Scrape the bowl and beater and beat for 1 minute more on medium low speed.
8. With the machine on medium low speed, add the heavy cream in a gradual stream. Beat 30 seconds. Scrape the bowl and beater again and beat in the salt and vanilla.
9. Remove the bowl from the mixer stand and remove the flat beater. Using a fine strainer, sift the flour over the batter. Attach the bowl to the mixer stand and use the wire whip for the final mixing. Turn the machine on to low and beat for 1 minute on low speed until the flour is completely incorporated and the batter is very smooth. Scrape the bowl to make sure. It will be the consistency of heavy cream.
10. Carefully pour the batter into the prepared pan on the baking sheet and set the baking sheet in the oven.
11. Bake for 60 to 65 minutes at 400˚F. The cake should be very dark brown and the center will be very jiggly. Set the cake pan on a wire rack and cool completely.
12. Refrigerate the cake in its pan overnight. The next day, unhinge the springform pan and lift off the side. Transfer the cake and parchment to a flat surface. Carefully peel away the parchment to reveal the side of the cake.
To remove the cake from the parchment I gradually slide a large spatula between the cake and the parchment. When the cake is entirely on the spatula, I carefully nudge the cake onto a cake plate. A rimless cookie sheet or the bottom of a tart pan will also do the job.


And that’s it. Refrigerate the cake until you’re ready to serve. To cut the cake, rinse a large sharp knife in very hot water, shake off excess water, and make a cut in the cake. Repeat before making each cut.
Serve the cheesecake cold or at room temperature. It needs nothing else. Fresh strawberries are lovely with this cake only if they are completely ripe and full of flavor.
Afterword
Did you make this recipe? Please let me know how your cheesecake turned out.
This post is for all my subscribers. Thank you all for supporting my work. And Happy Baking!
How flattering that you took me seriously and immediately investigated this cheesecake and then baked it with aplomb! Oh man it was creamy and sweet. I don't understand how something with that much fat can seem light, but it did. If it's not clear, every bite was heavenly. XO
It was my Partner in Dine's birthday, so I made your recipe for her! It's so good that we decided that the next topic for our Facebook Page will be cheesecake!